In this blog post, we’ll walk you through the process of creating stunning ombre dip nails using the pour-over method and eyeshadow brushes. Ombre nails are all about the mesmerizing gradient effect. With this technique, you’ll be able to achieve professional-looking results from the comfort of your own home. Get ready to elevate your nail game and dive into the captivating world of ombre designs!
Step 1: Gather Your Supplies To create fabulous ombre dip nails:
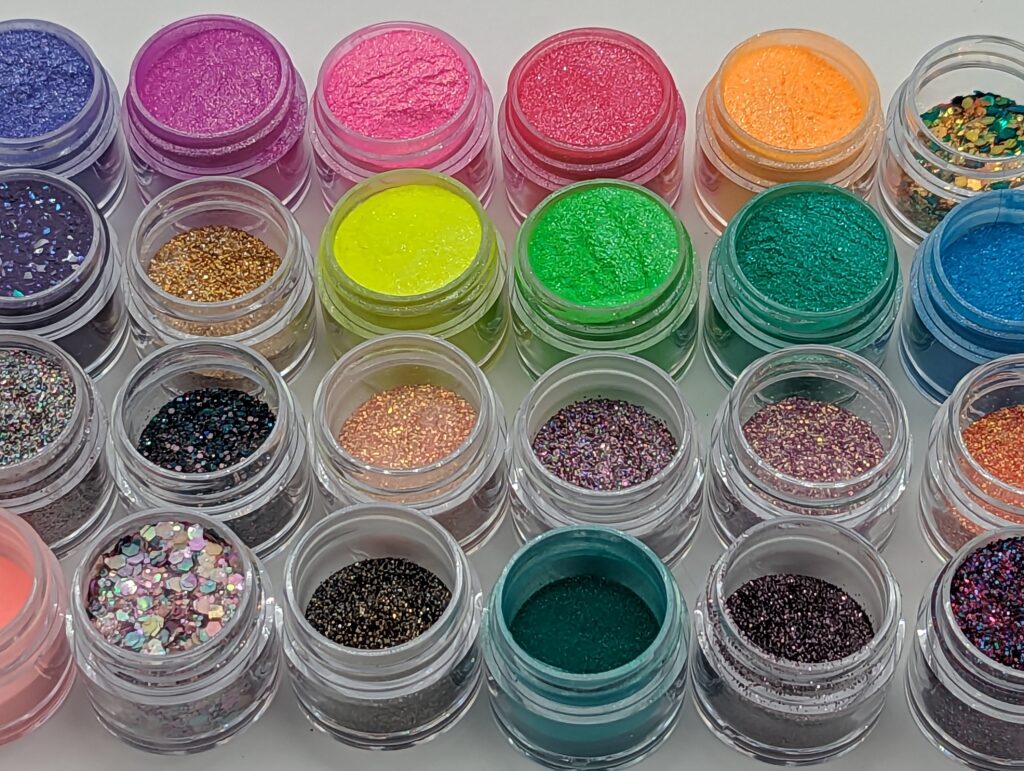
- Dip powder colors of your choice (at least two complementary shades): I recommend CN Designer Dips if you want high quality dips in sample sizes to try.
- Dip base coat, activator, and top coat
- Cupcake liners or similar small containers
- Eyeshadow brushes (clean and unused)
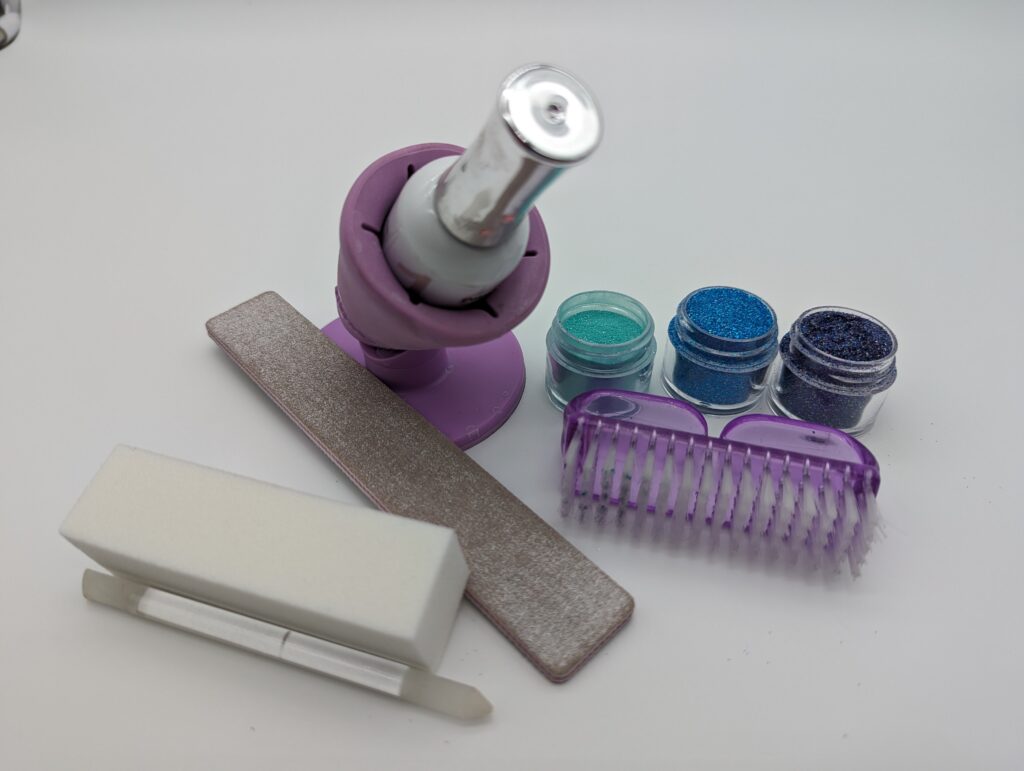
- Nail file and buffer: I prefer buying in large quantities.
- Glass cuticle pusher
- Lint-free wipes and alcohol pump bottle set
Step 2: Next prepare your nails with these simple steps:
- Remove any existing nail polish or dip.
- Shape and file your nails to your desired length and style.
- Glass Cuticle Pusher: Before you even think about polish, prepare your nails properly. Start by using a glass cuticle pusher. Not only is it more hygienic than its metal counterparts, but it also ensures a smoother, more gentle push, in addition to reducing the risk of damaging your nails. Gently push back your cuticles. This ensures that the dip powder adheres directly to the nail and not the cuticle.
- Alcohol Dehydration: After pushing back your cuticles, it’s crucial to rid your nails of any oils or residues. Swipe each nail with alcohol using lint free wipes. This step will dehydrate the nail and provide a clean slate for your polish. It’s the step many miss, but it can make all the difference.
Step 3: Apply the Base Coat:
- Apply a thin layer of base coat to your nails. Coat the entire nail bed with the base coat to ensure complete coverage.
Step 4: let’s dive into the exciting part—creating the ombre effect with dip powders:
- Set out your cupcake liners.
- Take one eyeshadow brush and dip it into the lighter shade of dip powder.
- Holding the brush above your nail, gently tap the brush handle with your other hand, allowing the powder to sprinkle onto the nail and into the cupcake liner. Focus on the bottom portion of the nail to create the ombre effect.
- Repeat the process with the darker shade while sprinkling it on the top portion of the nail.
- Continue sprinkling and layering the powders until you achieve the desired ombre effect. You can experiment with different amounts and placements to achieve your preferred gradient.
- Lastly, use a precision tool to clean around the cuticle to ensure the dip powder adheres to the nail and not the cuticle.
Step 5: Blend and Seal To create a seamless transition between the colors and ensure a long-lasting finish, follow these steps:
- Use a clean eyeshadow brush to blend the area where the two dip powder shades meet. Gently brush back and forth in a horizontal motion to achieve a smooth gradient effect.
- Once you have finished all your nails and the powder is dry, use a clean nail brush to swipe away any excess powder.
STEP 6: REPEAT STEPS 3 -5
STEP 7: Add a layer of clear DIP powder to add strength. Do two layers of clear for glitter ombre nails
- Apply thin layer of dip base.
- Pour clear dip powder over the nail.
- Use a precision tool to clean around the cuticle.
- Use a nail brush to wipe off any excess powder once you have applied clear to all your nails.
STEP 8: Apply Activator and file/buff your nails
- Apply a thin layer of activator to the entire nail surface while following the instructions provided with the dip powder kit.
- Once the activator dries, use a nail file to smooth out the surface of your nail. I like to rub my finger on top of my nail and the sides to gauge how smooth it is. Once it’s relatively smooth, use a buffer block to buff it completely smooth to touch.
- Next wipe away any dust using a clean nail brush.
- Lastly, apply activator again. Allow to dry.
STEP 9: Apply the Topcoat To protect your stunning ombre dip nails and enhance their shine, finish off with a clear topcoat
- Apply a layer of clear topcoat to each nail and use three quick strokes for the first layer.
- Immediately apply a second layer of top coat. This time take your time and make sure to apply top coat evenly across the entire nail.
- Finally allow the topcoat to dry completely.
Congratulations on achieving stunning ombre dip nails using the pour-over method and eyeshadow brushes! Remember to explore different color combinations, experiment with sprinkling techniques, and let your creativity shine through your unique ombre nail art. Stay tuned to Surrealmuse Nails for more nail art inspiration and tutorials. Happy dipping and blending!