Dip powder nails are a great way to get a long-lasting, salon-quality manicure at home. They’re also relatively easy to do, once you have the right supplies. And you don’t have to spend a lot when you are first starting out and want to try it out, but don’t want to spend a lot to get started. Here is how to get a salon-quality dip powder manicure on a budget.
Essential Prep Supplies
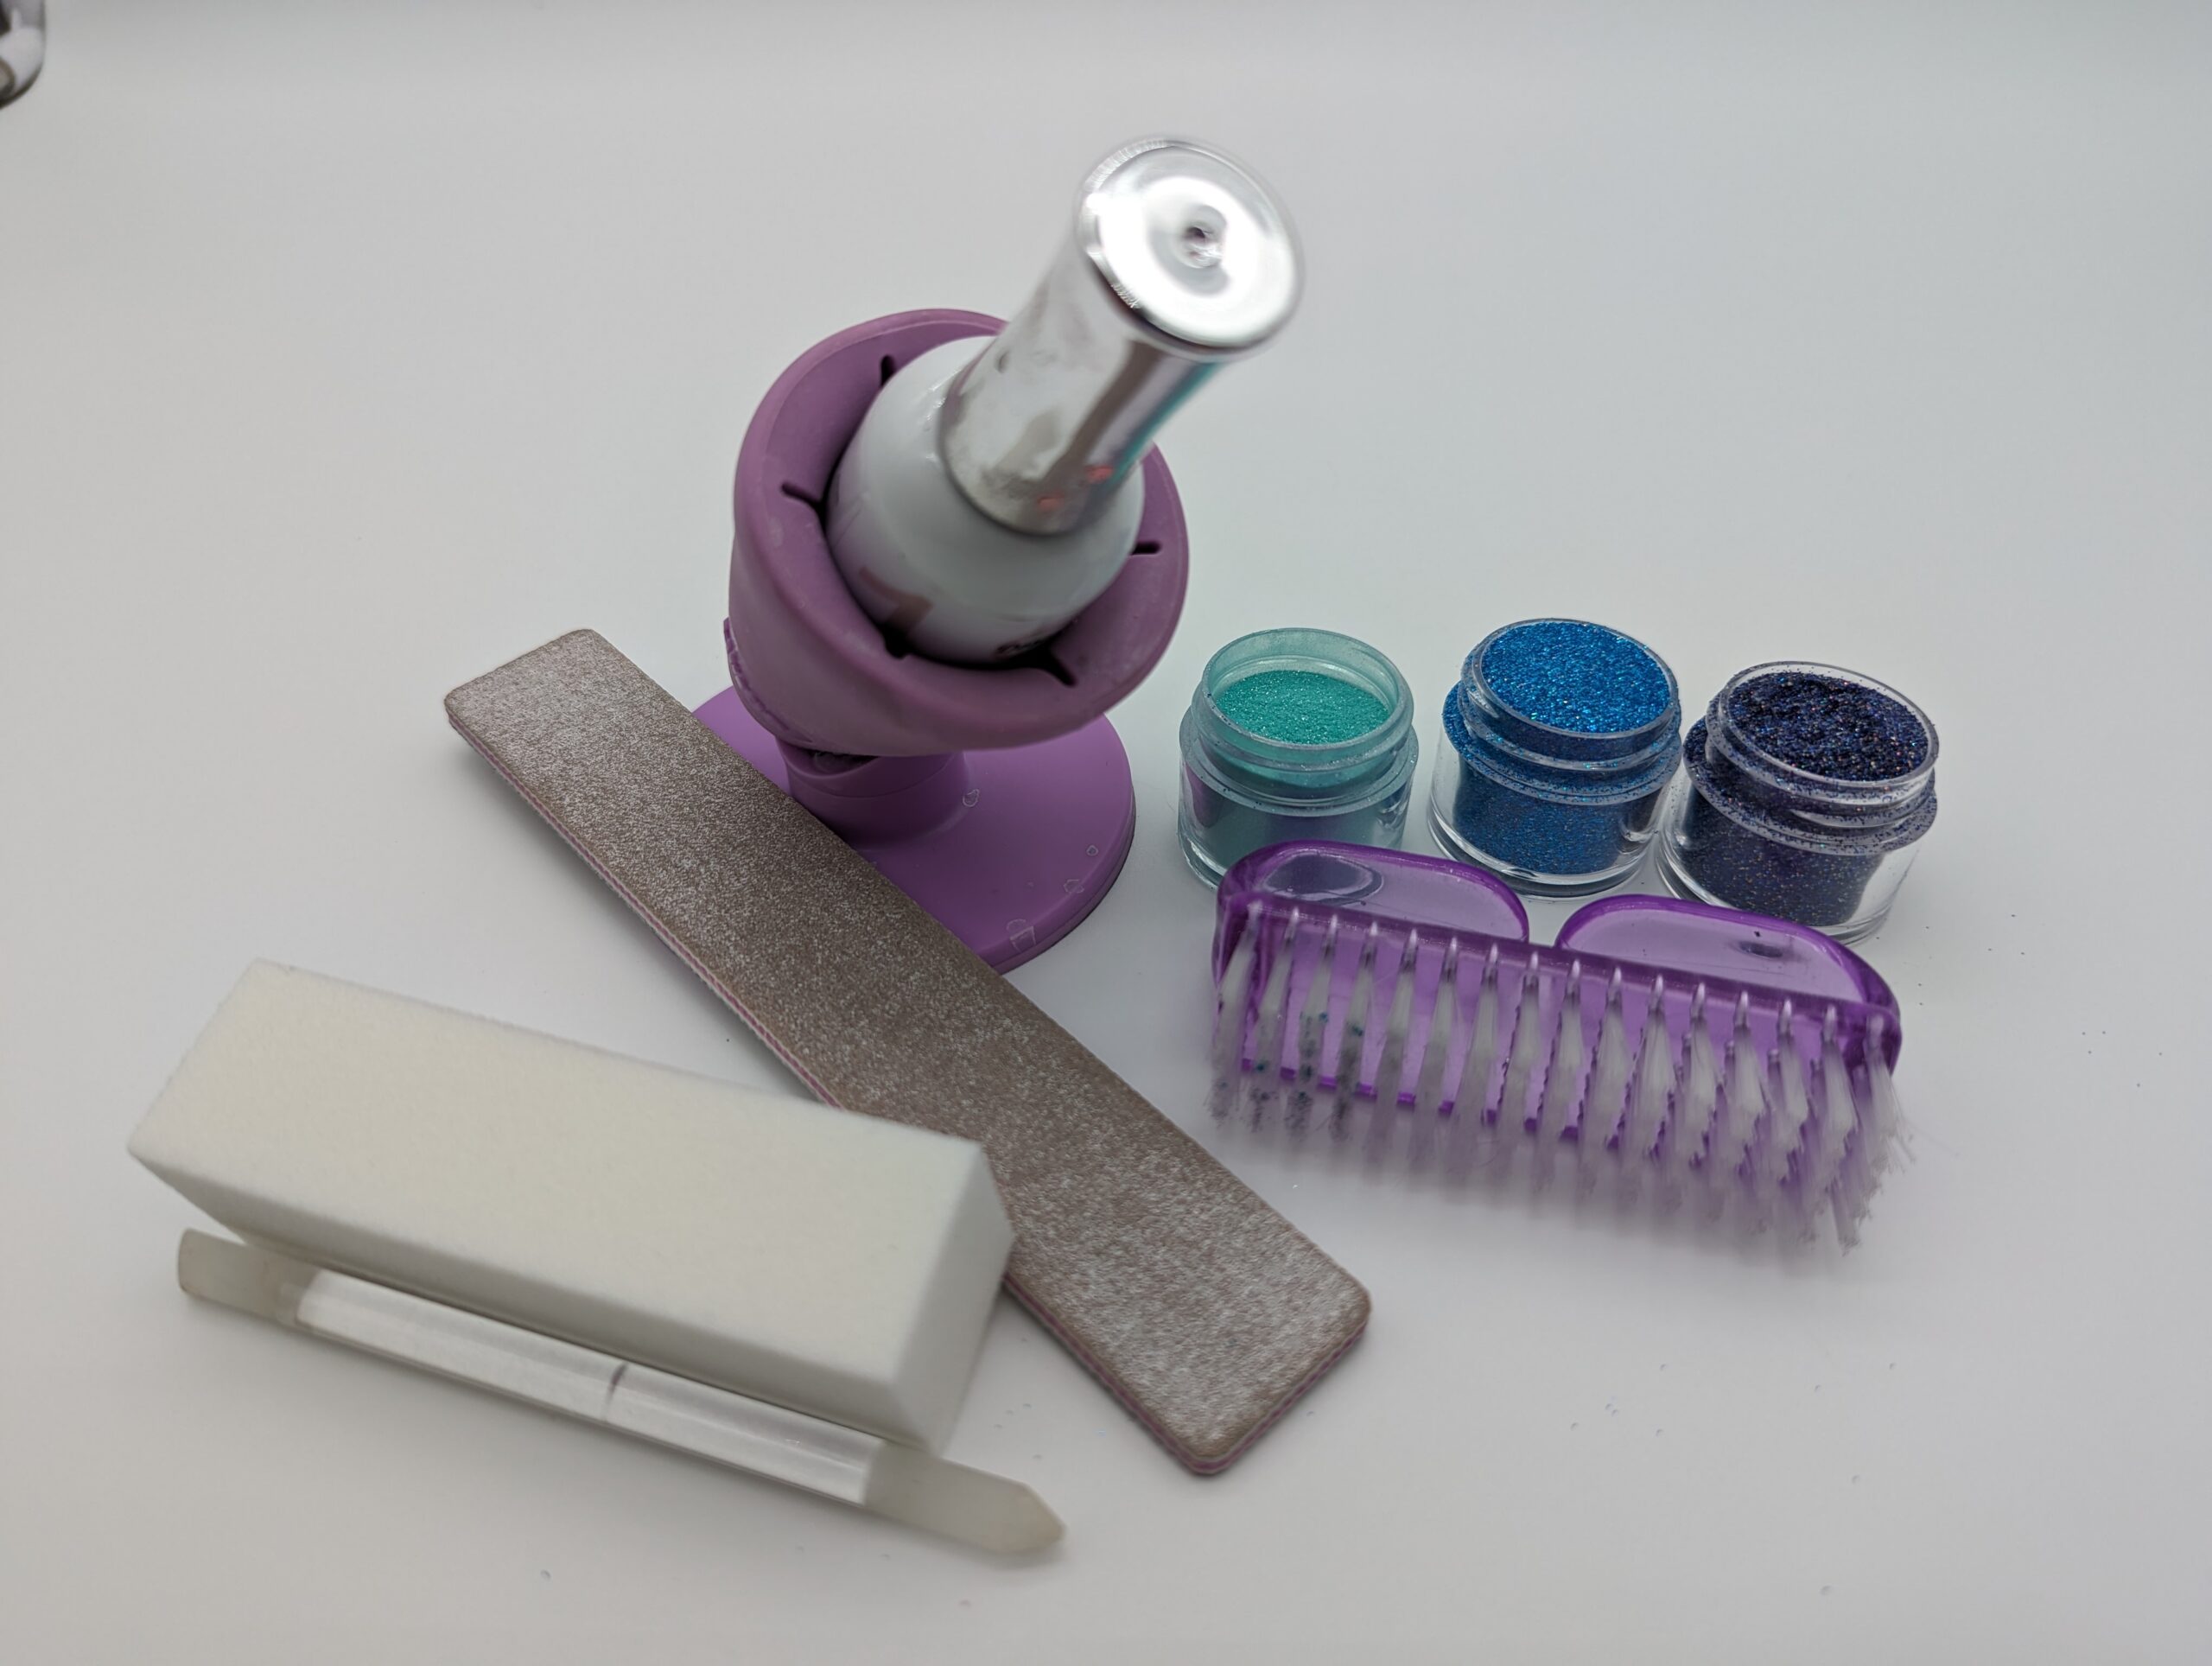
- Glass cuticle pusher. This tool pushes back your cuticles and prepares your nails for the dip powder. A glass one will also ensure you remove the invisible cuticle.
- 100/180 grit nail file. Lightly file your nails to remove the shine,
- Rubbing Alcohol: Works just as well as dehydrator and is cheaper.
- Lint-free wipes. Used to clean your nails and tools throughout the process.
Essential Dip Application Supplies
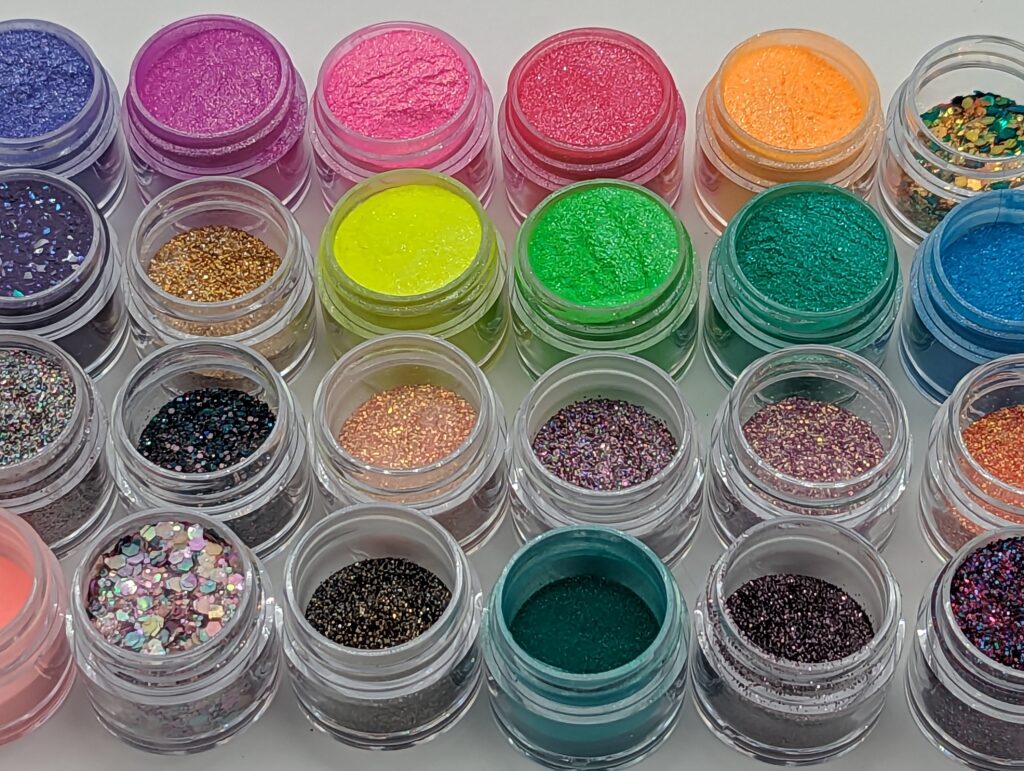
- Dip powder. This is the main ingredient in dip powder nails. There are a wide variety of colors and finishes such such as solids, shimmers, glitters, foils, thermals, and uv, so you can find the perfect look for you. Read my review on CN Designer Dips.
- Base coat. This helps to protect your nails and provide a smooth surface for the dip powder to adhere to.
- Activator. This activates the dip powder and helps it to set.
- Top coat. This protects your manicure and gives it a glossy finish.
- Brush saver liquid. This is used to clean your dip powder brushes, so that they last longer. You especially need it if dip powder gets on your brush. If you use it, make sure to completely dry the brush. And brush saver liquid left on the brush, will harden your dip liquids. To be sure to dry well. Modelones has a good starter set with all four liquids.
- Toothpick or precision tool. This is used to clean up any excess dip powder around your nails after dipping into the powder.
- Nail Brush. Once your dip layer tries, I often finish both hands before I dust off the first hand. Read your liquid dry times to know for sure how long to wait until you dust off. Also, I recommend getting a couple so you can keep them near sinks where you was your hands often in case you need to clean the underside of your nail between manis.
- 100/180 grit nail file. Use to file your nails into shape before applying the dip powder.
- Nail buffer. Use to buff your nails to a smooth finish before applying the dip powder.
- Paper Towels. When you are first starting out, lay down paper towels in your work area so clean up is easy if you spill powder. It’s also useful to wipe your brushes in between dip layers.
Essential After Care Supplies
- Cuticle oil. This helps to keep your cuticles hydrated and healthy.
Wish List Items
In addition to the essential supplies, there are a few other things that you might want to consider having on hand:
- Nail Drill. Features to look when purchasing an affordable nail drill for home use
- Nail Drill Holder. This helps to keep your nail drill in place while you’re using it.
- Organizers for supplies. This can help you to keep your supplies organized and easy to find.
- Cupcake holders or silicon cups for pour over method. How to Dip Nails: The Pour over Method
- Silicon Mat. If you don’t like to waste paper towels, you can get a reusable silicon mat that is easy to clean up.
- Nail Bottle Holder. The holder will tilt your liquids so it’s easier to get the liquid when it’s low and you’re less likely to spill your liquids if it’s securely held in place.
- Tips. Add length to your nails with tips. You can use tips to extend the length of your nails. Some come pre shaped in almond, stiletto, and square to name a few. Also look for ones that are pre-etched on the underside so you don’t have to file the underside. I personally recommend Una Gella full coverage tips.
- Nail Glue: If you use tips, Dashing Diva has a nail glue that applies thick like gel but doesn’t require curing under uv and lasts a month or more!